Monday, December 12, 2011

SAVE THE DATE - The final product

I know you have already seen the save the date, but I wanted to put the finished product on the blog for others and because I plan on having a printed copy of the blog made when the wedding is finished. That way I can bore my future children with my craziness as a bride. :)

So, here it is!


I have a few graphics that I would be happy to email to you if you want to steal them or parts of them. But, other than that here's what I used:

Fonts: Amelie, Ecuyer Dax, Calisto MT 

Linen Paper
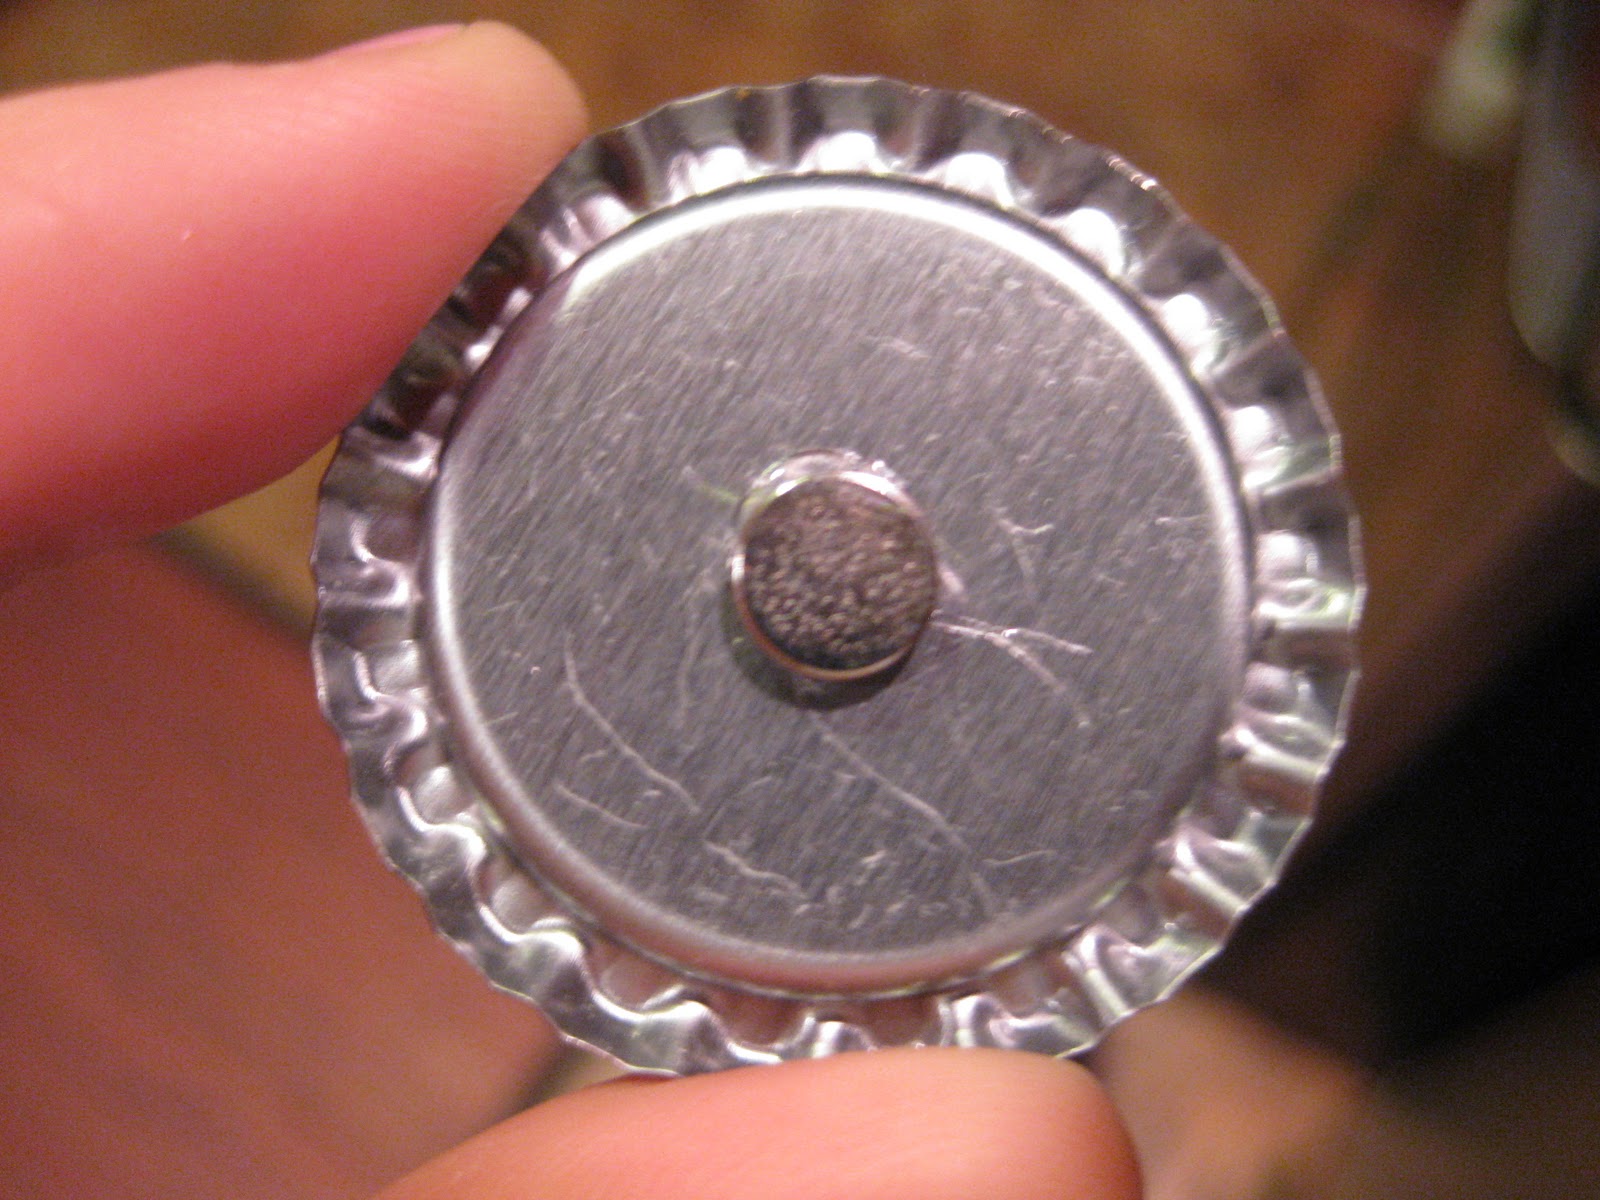
70lb white envelopes (heavy duty so that the magnet wouldn't break through, click here for instructions on how to make the magnets)
Embossing kit for the heart
Small Corner punch
Removeable glue dots to attach the bottle cap magnet
HP photosmart 410 printer

Friday, December 9, 2011

SAVE THE DATE Design Failure

I'm a save the date snob. :) Oh no, I definitely couldn't just have something generic. And to add to the problem, I have wine taste on a beer budget. There was really no choice but to make my own. Only problem was... I had absolutely no experience designing.

It took me a lot of time to figure out how to design something I considered "cool" on the computer for free. One issue I had was that I refused to pay for graphics (pictures, drawings, etc), which meant I either had to make it myself or limit myself to free graphics. FYI, most of the time, free graphics suck or are difficult to find. It look a lot of time to find the things I was looking for. My other issue was that I had no idea how to edit graphics using photoshop or gimp. I ended up teaching myself to use these programs through trial and error and then designing the rest of the project in powerpoint. Powerpoint has come a long way and you can do a lot in it, but it has its limits. And as I said before, I really had never designed anything paper material related ever. My first few trys making a save the date and invitation design were lacking, to say the least. Want to see my disasterous attempts? Don't laugh too hard...


The first one just looks sad to me. The second one is boring (and it looks funny because I removed our last names). The last one was supposed to be trees. One from Michigan and one from Florida. But, this just didn't have a fun factor. Besides the poem, of course.

We have had the "poem" for quite some time. We wrote it at 3am while driving from Michigan to New Jersey in the summer of 2010. It has changed slightly over time, but most of it was written while we were sleep-deprived that crazy night so long ago. Yes, I did have to nag Wes a bit to participate in writing the poem, but he got pretty into it after awhile. Some of the best parts of the poem were written by Wes. I think our poem is cute, funny (in a ridiculous way) and is "us". So, it was a must that it went in the save the date.

I was so hell bent on having something original. With the limited resources I had, it was very difficult to make anything look professional. I am not sure if I was successful or not in making the save the date I sent you look professional, but we love them and that's all that matters in the end. Still, I have this crazy goal to have one of those fabulously styled weddings  (on a limited budget). I am quite proud of what Wes and I accomplished. They were supposed to have some more details, but then real life happened, as it always inevitably does, and I decided that other things were more important than adding those details. They probably look better without the extras anyway.

My suggestion to anyone wanting to design a paper material who has no experience in design is to do the following:

1. Ask yourself if you really really want to design them on your own or just sort of on your own. There are lots of fabulous people in the world who went to school for graphic design and will design something for you...for a price. For example, I found people at Etsy.com and Weddingbee.com who will design everything (save the dates, invitiations, rsvps) for someone and then send them the file so the person can print it out themselves. Sometimes I found people on Weddingbee.com who would send me a design they used for free that I could alter.

2. Make sure you give yourself lots of time to design before needing to make them, especially if you are a perfectionist like me. I went through a lot of designs.  Even if I thought I loved something, I would alter it just to see if I liked it another way more.

3. Accept that it may not look exactly perfect ever and don't feel bad if you realize that your first few attempts were "lacking".... like mine.

4. Less is more. Try to remember that. :)

Happy designing!

Sunday, December 4, 2011

SAVE THE DATE Inspiration

So! I bet you want to know how you ended up with such a beautiful Save the Date. Ha! I really love our Save the Dates and I suppose I think they are beautiful because it was a long journey to the finished product.

The Save the Date idea is a fun trend going on in the wedding world right now. I think it is great because you can share information with the wedding guest well in advanced. Mostly I was hoping to make it easier to put in for time off for people who have to travel to come to our wedding. And, there are a lot of you who will have to travel. Thank you in advanced. We love you. Seriously.

So, yes, Save the Dates are practical. But, that doesn’t mean they can’t be pretty as well. Early on, Wes was really digging the idea of taking pictures of our pets dressed in bride and groom outfits. And I do mean WES was excited. If you don’t know by now, Wes really really REALLY loves his dog.


Mo. How do you not love that face? I probably fell in love with Mo before Wes.

We added another member to our family early in our relationship when Wes and I bought a ferret.


Emily, the princess. Or evil monkey. Depends on who you are asking.  

We love our fur babies. But, getting them to sit still to take pictures together, in outfits, none-the-less, would have been impossible. It turns out something like this every time:


So I ruled out Mo and Em dressed up as bride and groom.

But, there are tons of other cute ways to announce the date of your wedding.


Love these cute cut-out numbers….way too time consuming for me.

Calender. Love this.

One thing was for sure. I refused to pay for someone else to do these for me. This wedding is "do it yourself" all the way, baby. So, I set out to design my own.

Would you take the time to make your own Save the Dates?

Saturday, November 26, 2011

Catching up

Hooray! You've received your Save the Date! We really wanted to send out a "reminder" that, indeed, we are still getting married. It has been a looooonnnng engagement, but have no fear! We still love each other and want to be chained together for life. And, if you are reading this, you see that we wanted to give you links to our website and my blog.

I am using this blog as a fun way for me to document the journey and keep everyone from far away updated on wedding planning. I have been blogging for awhile so for everyone that has missed the passed few months I thought I would catch you up. Below are links to each post I have published so far. Have fun!

I introduced ourselves in "Who we are".
I explain the beginning of wedding planning in "Dealing with initial budget blues".
I outlined my DIY list in "The countdown commences soon".
I talked about building a good foundation in our marriage in "Working out the imperfections".
We had a small adverture picking out wedding colors in Lavender and amethyst and grape, oh my!"
I discussed shoe inspiration here.
I introduced the bridal party here and here.
I talked about bridesmaid dresses in "Dressing the maids", our shopping trip for dresses in "One dress, two dress, three dress, four"  and groomsmen garb in "I'm too sexy for my tux".
I introduced our ceremony and reception site in "Where shall we wed?"
We checked off lots of things on our to-do list in "In current news".
I talked about staying fit during my trip to Finland here, here and here.
I talked about our photographer not once, but twice.
And, I talked about making bottle caps for your Save the Dates in "DIY: Bottlecap magnets"

Thursday, October 13, 2011

DIY: Bottlecap magnets

I am sure you all have been impatiently waiting for a DIY project! Me too.
Now that we are 253 days from the wedding, it makes sense that I can start crafting!!!

DIY Project 1: Save the date magnets


First, sending out save the dates and doing it fairly soon is important to us since most of our invited guests will be from out of town. Sending it out enables everyone to know exactly when and where the wedding will be so people can save money and/or personal days to take off from work. Also, everyone will get the address for our wedding website for traveling and hotel information and the address for this blog so more people can follow along.
Now let’s start crafting! It is very popular to have a magnet incorporated into your “Save the Date” and I jumped on that bandwagon with no shame. Magnets are fun! Slap it on your fridge and you have a constant reminder of the fun times that lay ahead. I didn’t want the actual save the date to be a magnet. I wanted the magnet to be something cute on its own so that people might reuse it. My mom and aunt make super cute bottle cap jewelry and I thought, well let’s turn bottlecaps into magnets!

Materials needed:
Bottle caps, I used flattened ones from a seller from Etsy, fizzypops, so that they will better fit into the envelope.
Bottle cap epoxy stickers from fizzypops (trust my family, they are much easier to work with than glaze)
1in circle punch
Glue dots, the mini permanent dots, the super thin permanent dots, and also removable regular size dots, one each for 1 magnet. I bought mine from amazon.com.
Magnets
A helper, such as your beautiful and generous mother and fiance

  • Create image that fits into a 1in circle. I know you can use Adobe to make beautiful images but I am much more comfortable with power point so here’s my cheat method of making images. I used fonts from dafont.com and I arranged the text boxes like I wanted and made it very big and then grouped all the text boxes together. I then saved the image as a picture by left clicking and selecting “Save as picture”. Next, open powerpoint again. Resize the “slide” to be a standard 8.5 x 11 in sheet of paper. That way you will be working with the image and know exactly how it will print on a regular sheet of paper. (I changed the dpi of the image using Irfanview before the next step to make sure the image looked sharp.)  Insert the image and then copy and paste the image onto the slide over and over leaving enough space between the images so you can punch non-overlapping circles. I spaced the image too close together even though I was thinking about it, so be careful not to do this! Then, click “Save as” under “File” and save it NOT as a powerpoint file, but as a pdf file. Saving it as pdf file ensures that the size of your sheet and images remains the same when you print.
  • Print on 80lb cardstock. We used a glossy paper and had it professionally printed on a laser printer at my mom’s work. But, I am sure your home printer and nice cardstock from amazon.com would work fine. We are using our home printer for the actual save the dates.
  • Make your mom punch out all your images. My mom was really patient with me as the first tinge of bridezilla came out. I wanted the images centered in the bottle cap, so I kept telling her to re-punch ones that weren’t centered. Wes and my mom said it was all in my head and that not every single one had to be perfect but I think it is pretty obvious. 
See? Would you want to be the person who got a non-centered magnet? I think not… 


Wes and I have a friendly competition going on, so this poll is most interesting to us. J
  • Stick the CENTERED punched out image onto one of the epoxy caps with the image facing down. Press firmly all around to remove any air pockets between the cap and the paper. The epoxy caps are sticky already so just place and press.
  • Put an ultra-thin glue dot into the bottle cap.
  • Put your punched out image with the epoxy cap into the bottle cap.
  • Put a mini glue dot onto back of the bottle cap. I liked that these little things were stuck between two sheets. I peeled off one sheet, push the glue dot on the bottle cap and then peeled off the second sheet. So easy.
  • Excuse my icky nails.
  • Take one of your magnets and push it on! A word on magnets: I hate magnets that are too weak to stick to anything. It was really important to me that the magnet would actually stick to our guests’ fridges. So, I bought neodymium magnets. I used these ones from magnets for less. Lots of fun to play with, very small and great holding power!

  • Use the removable glue dot to attach the magnet to your Save the Date so it won’t slide around in the envelope.
  • Seeing that our save the dates are going to be a bit bulky because of the magnet, we ordered durable 70lb envelopes from actionevenlope.com. We will also get the save the dates hand stamped at the post office so your magnets will arrive intact.

Three hours of my life tops and you get such a fun little thing!
Photos from a booth on the Jersey Shore

Now we need the actual Save the Date… but first the very long process of designing those suckers.


Wednesday, October 12, 2011

So far, I love my photographer!

I know in my last post that I left things off in a "we'll see" way. However, since writing that post, it has been confirmed that I definately love my photographer. For the following reasons:

1) After signing our contract, she sent over a hard copy.... just look:


How freakin' cute is that? This stationary is an example of how wonderful her products are, including her photo albums. She has such amazing style.

2) She addressed all my concerns in our contract with no hassle. Example: She agreed to drive beyond our contractually agreed limit for our engagement photos to Clarkston, MI for no extra charge. Where I grew up! She usually shoots in Birmingham, MI and it is a very cute city, but it has no meaning for Wes or I. Clarkston is where my family is from...my dad grew up in the same house I did. It has a pretty and quaint downtown area and it served as a nice backdrop for, hopefully, some really wonderful pictures. The point wasn't to have Clarkston as the main feature of our photos, but being somewhere we considered to be one of our homes made us feel more comfortable.

3) You can probably tell by the tense I am writing in, but we have had our engagement photos taken and it was a lot of fun to work with Kristen! We don't have the photos yet... sad face. I keep checking her blog every day to see when she is going to put up some sneak peeks. I was saying before in my last "photography" post that I felt that if I gave Kristen something cool to work with that she would respond to that. Well, she did. Of course, she did all the typical Kristenesque shots. (Grabbing Wes's arm while I smile at the camera and Wes looks off into the distance while contemplating our future...so dramatic.) But, she also took pics of us on the swings, holding pumpkins from the local market, holding a cupcake from the local cupcake shop AND using some props that we brought along. Such as:


Part of what makes us a fun couple (in my opinion) is that we have completely different viewpoints on 99% of everything. Yes, that makes us fun. Well, at least interesting. Yet, ultimately we both want the same things... family, adventure and world peace. How we are able to reconcile our differences to be even better people has helped make this almost 4 year relationship more rewarding than I thought possible. So, we used these silly flags and a few other things to represent those sentiments.

I can't wait to show you some of the engagement photos!

*all images are personal photos

Wednesday, October 5, 2011

How to book your photographer like a crazy bride

By far, the most important expense on our wedding day for us is photography. The cake will be eaten, the invitations hopefully admired for least 1 minute (please!) but then tossed aside… my dress carefully stuffed away only to be pulled out when I am feeling nostalgic. But, the photos will remain. I promise to pinch every penny for everything else, but I have to absolutely have photos that knock my socks off.

This past summer, I was working on the major components of the wedding. I met with my first-pick wedding photographer with my mom and to-be mom. I knew going into the meeting that she was outside of our photography budget. But, I love love love her photos. I figured I would try and see if she would come down a little and she did based on that were adding a few extra goodies to our package. The moms also very much liked her photos. Her photos are crisp while still being romantic. I probably would have booked her right away, but a few things gave me pause. 1. She was very friendly! However, she wasn’t overly zealous and all warm and fuzzy – more business-like. Which is good but not what I was expecting. 2: I felt like many of the weddings she photographed all looked a little bit alike. I think it is because her customers have beautiful weddings but they lack personalization… in my opinion. So, my big question is: Can I get her to shoot my wedding with a bit more creativity?

It seemed like I had to definitely meet with another photographer in order to make a decision. I had an appointment booked with another photographer for July 3. However, the goal was to meet with three photographers, so I could feel like I was making an educated decision before spending tons of money. I found a few more photographers whose photos were also fabulous, but one by one they all got back to me saying that they were booked already! WHAT! We were still 1 year away…..how can they be booked!?!! Sad face. All those stupid wedding checklists in books, magazines and online say to book your photograph 9 months to go. Lies. All lies.

Naturally, I freaked out. All I could think was WHAT IF MY FIRST-PICK PHOTOGRAPHER GETS BOOKED BEFORE I MAKE A FREAKIN’ DECISION?! One part of me was telling me that I needed to wait until July 3rd to meet with another photographer to ease my concerns about creativity before making a rash decision. But the other part (the crazy part) was telling me to but a deposit on that photographer NOW. What to do!?

Sigh. I gave into my craziness and emailed the 1st-pick photographer to book her before I had met with the other photographer. Whatever. I know that I am ridiculous, but I also knew that I would be happy with her photos and she is (sort of) close to our budget.

The good news is that because we had to work out a contract I still had time to meet with the July 3rd photographer.  (I did feel slightly guilty for meeting with another photographer even though I had told photographer #1 I would book her.) Wes and I went to the second meeting and it gave us a lot of think about, but we still felt that we had made the best decision going with photographer #1.

So without further ado… Kristen Taylor of Birmingham, MI will be shooting our wedding!


Swoon.

I feel that if I make our wedding fun and unique, then Kristen will respond to that. Now, I have to make all of you promise to smile and not be talking on your cell phone in all my photos!

What do you think should be the most important thing to spend money on? Would you book somebody without meeting with anyone else?